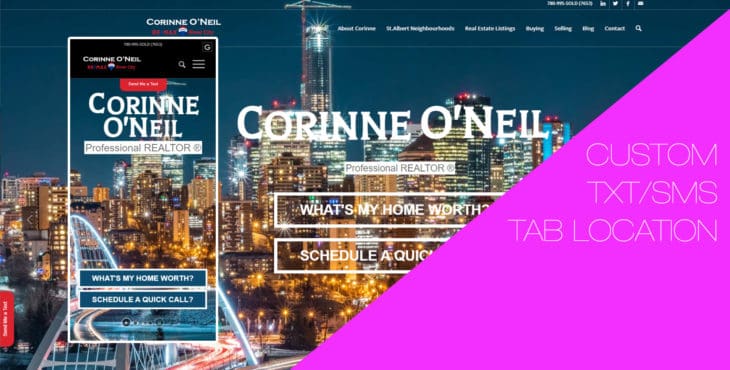
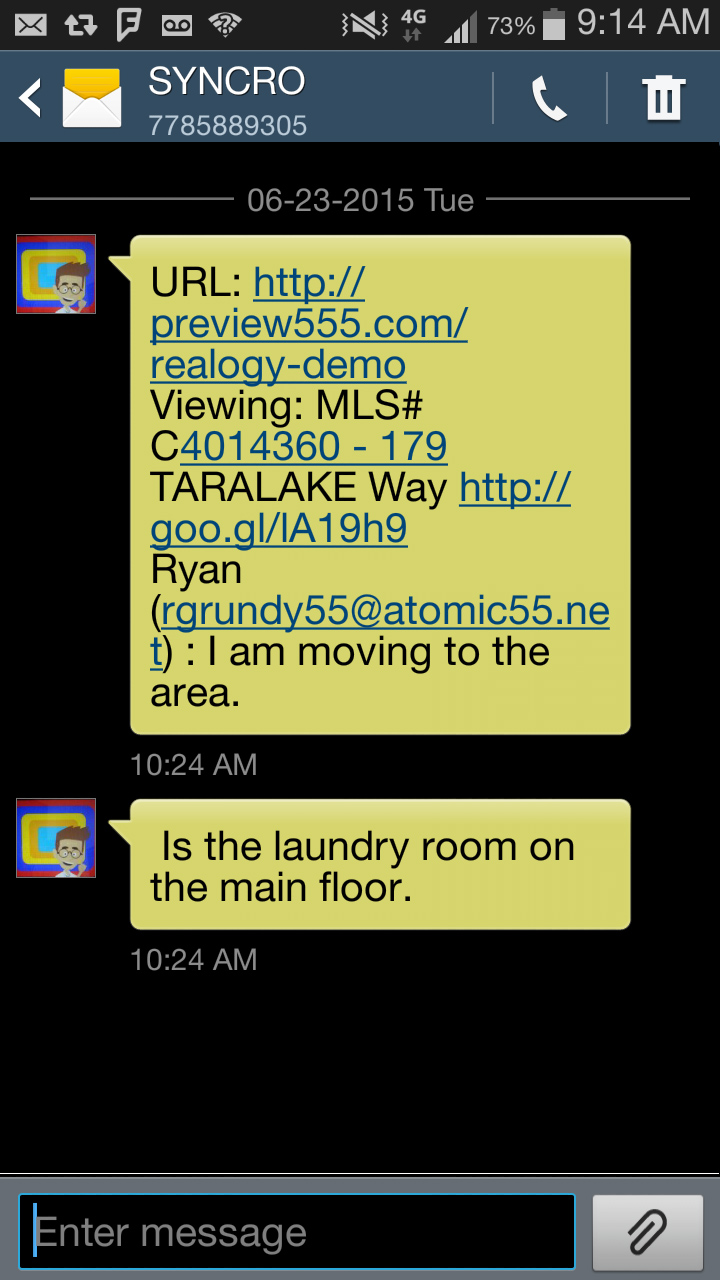
SYNCRO’s TXT/SMS feature provides people visiting your website the ability to send you an SMS.
Receiving contact requests, and leads through SMS is one of the most important communication channels you can have open within your website. The instantaneous communication afforded through SMS is one that is unique, and provides you with an advantage over your competition.
Default Setup
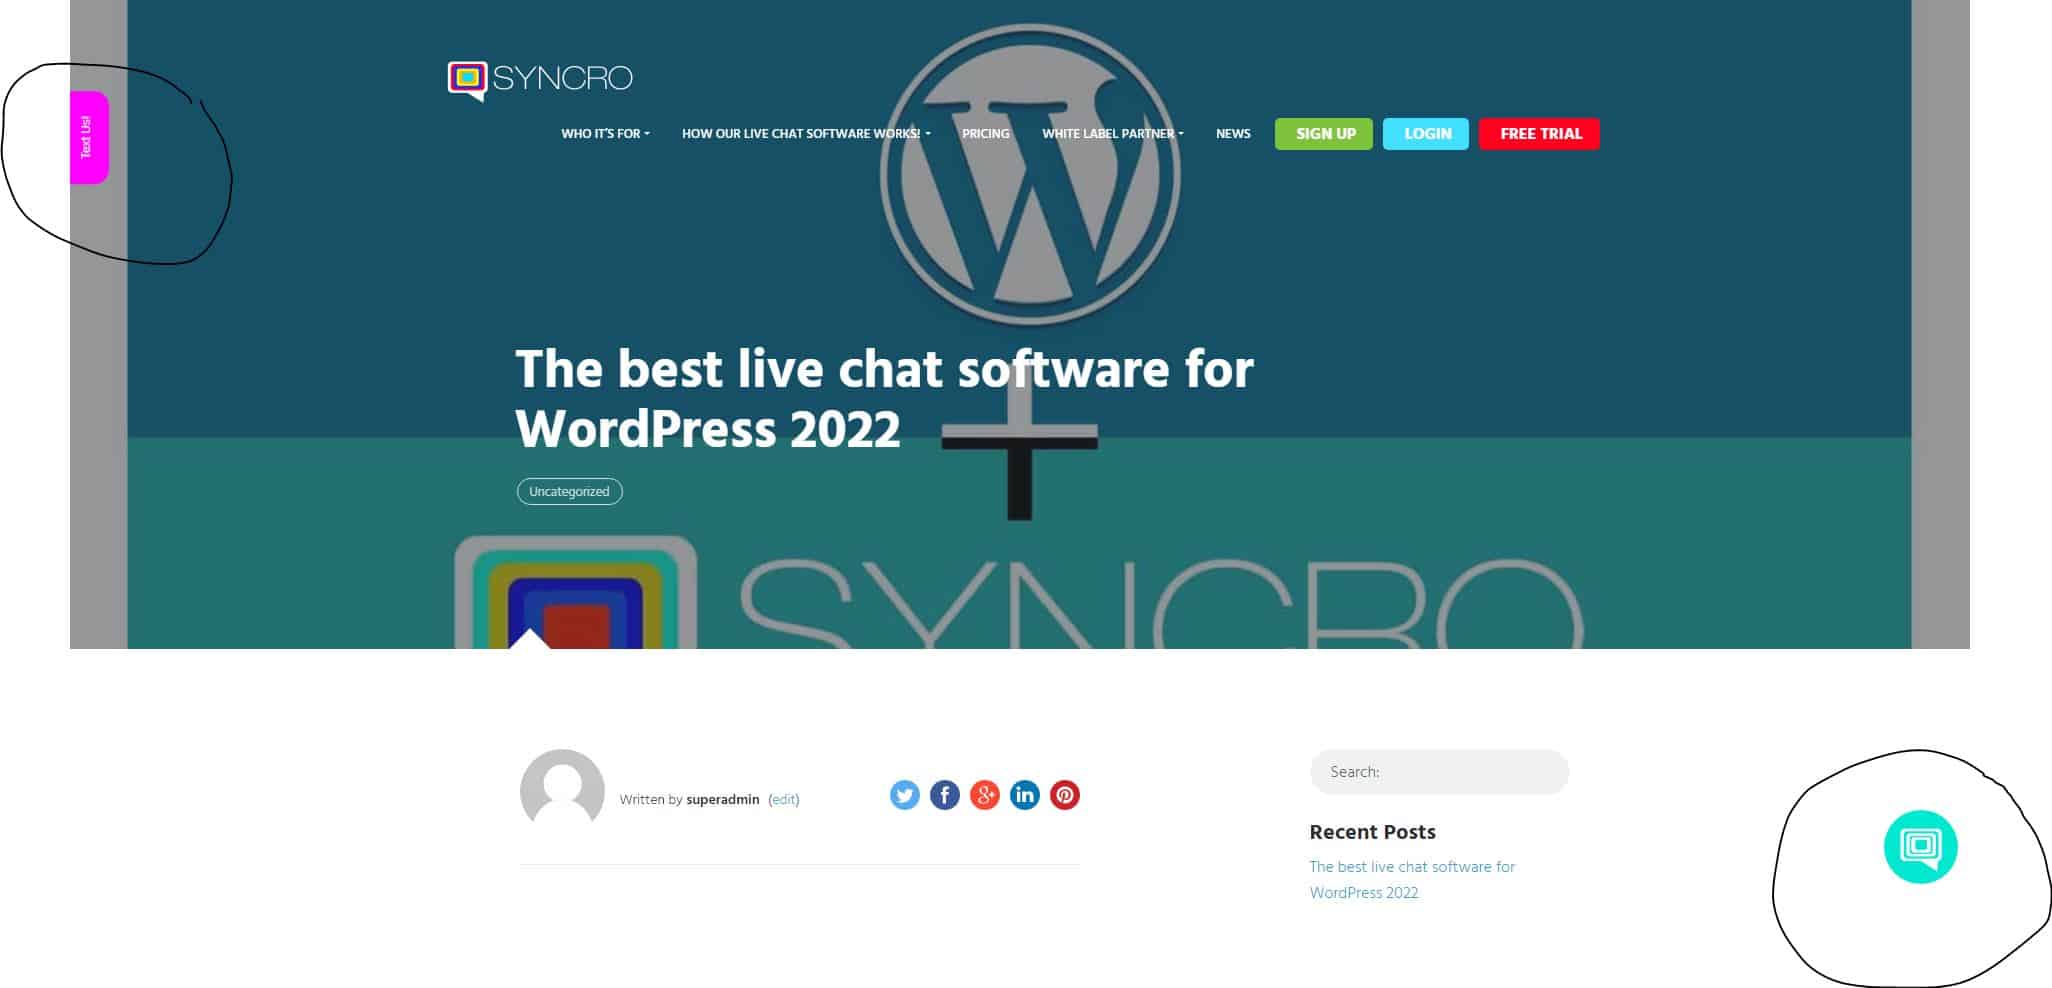
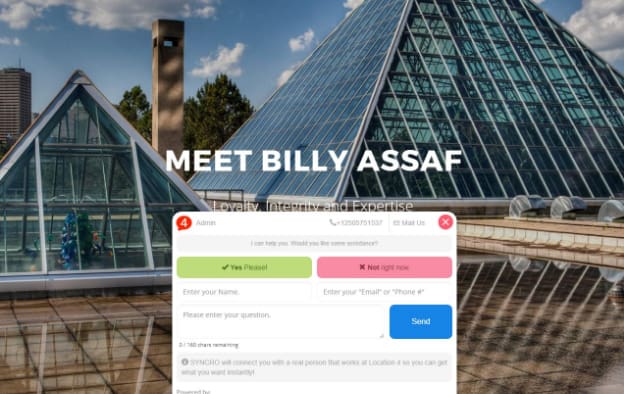
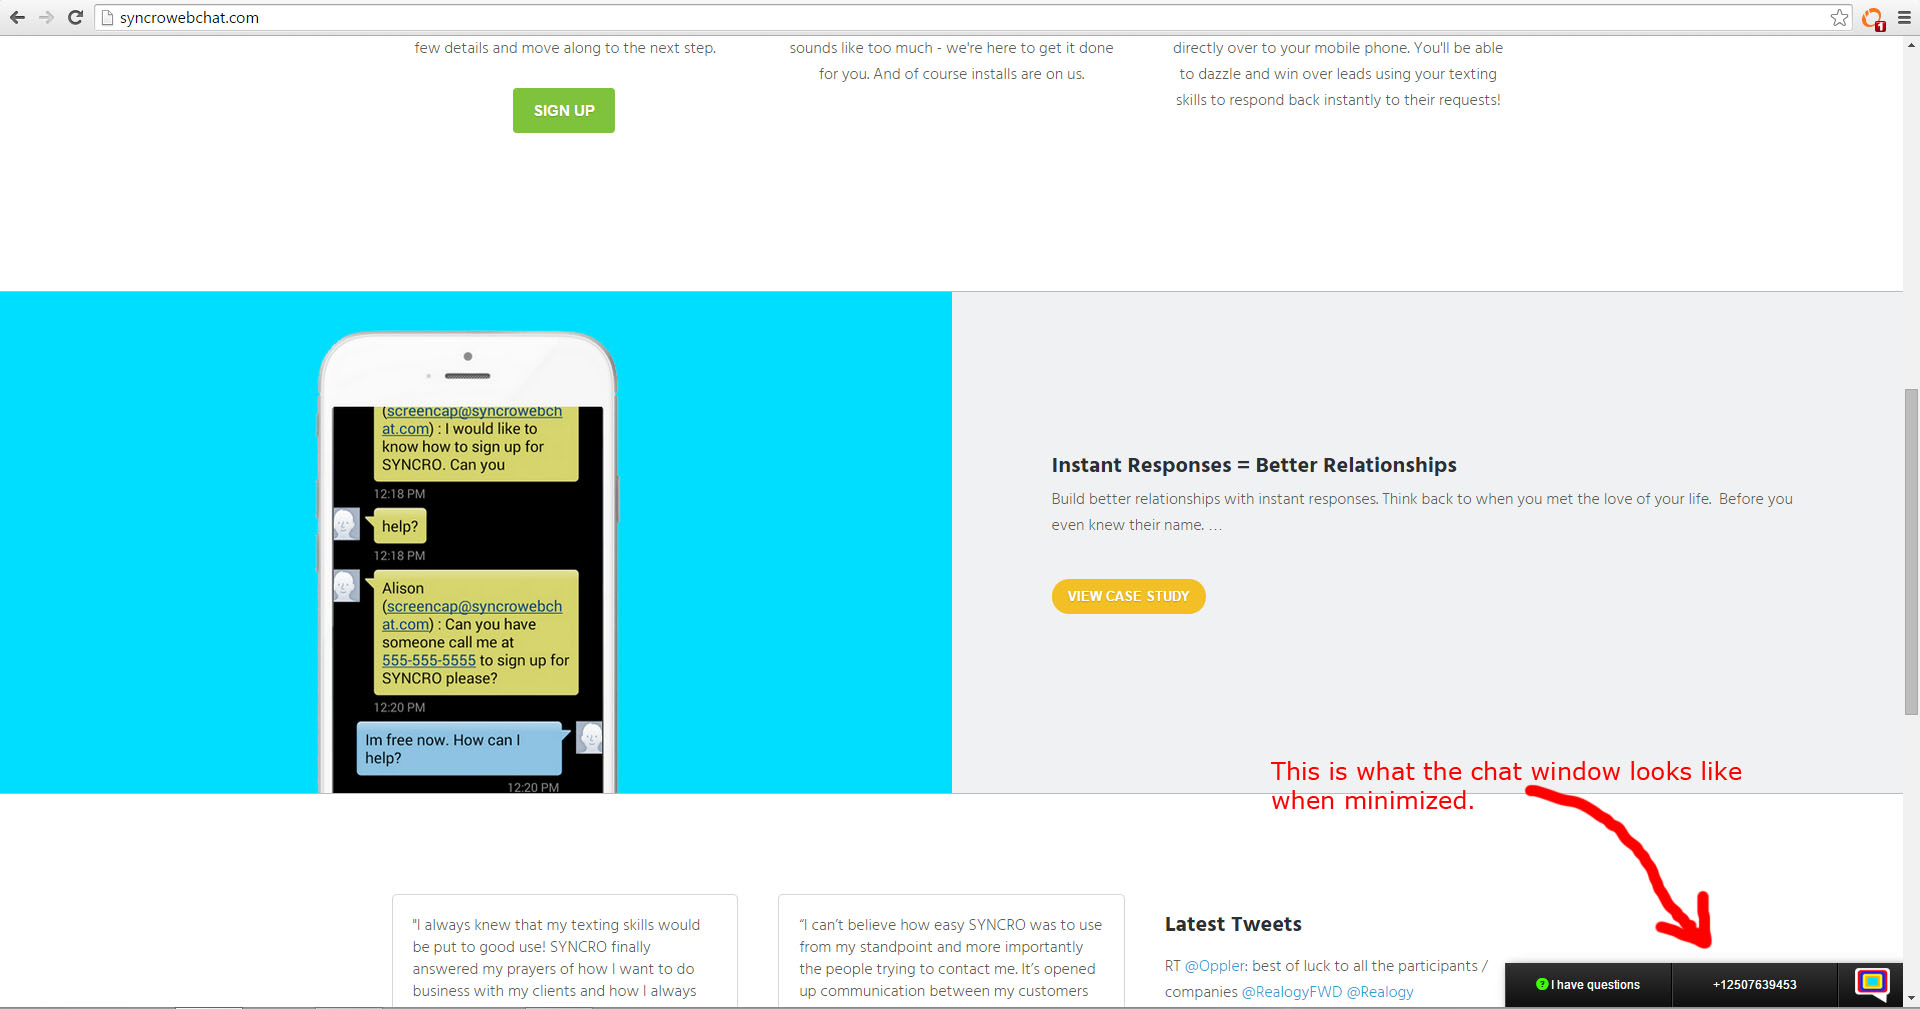
When enabled our text tab can be positioned in 4 quadrants on a website: top left, top right, bottom left, and bottom right (example below shown in desktop, in bottom left).
Customized Setup
If you want to customize the location of the text tab, it can be done quite easily with a few lines of CSS. You can adjust the location of the tab globally so that all pages carry the new location, or you can inline style the adjustment on the page you wish to adjust. For example, adding the following lines of code with change the orientation of the tab, and the location in mobile devices only:
Comments Off on Is it possible to customize the location of the TXT/SMS tab? Absolutely! Read on to find out how.Written by superadmin
If you are a small business owner, a REALTOR®, or a business professional that wears a lot of hats in your day to day, you know how valuable your time is. Juggling limited time, and being able answer questions about your product or service by flagging leads that come in through your website can be an arduous task. Did you know that 70% of all leads that come in from a website are lost or cannot be accounted for because the requests end up in an email spam folder or due to poor configuration of the website, they are dropped at the originating point of contact?
Our live chat software which has been designed to work within WordPress and its core framework can have you up and running, chatting with customers from your phone’s SMS service in about 10 seconds. No need to install an app on your phone, or learn anything new, simply plugin the best live chat software for WordPress – SYNCRO, and start chatting with your customers immediately. Our chat software is designed to be ultra simple to use, and covers off all forms of contact with ease. Start receiving text requests, live chats, and even contact form submissions within your website through one control panel that has been designed to be easy to use and very simple.
Easily see all of your leads in one location, from all communication channels. You can even BCC the contacts that come into your favorite email drip software for automatic follow up. SYNCRO has so many features that are unique to the live chat industry because it is built 100% on an SMS backbone. This means you can forward chats to other cell phones, send chats to multiple people at once, and even group chats into different departments and roles.
Never before has there been a revolutionary live chat software for WordPress, until now. Want more proof? Try looking around our site, as we have many articles and pages that describe how SYNCRO works, and the benefits to our users. Want to give it a try – sure. Sign Up for the Best Live Chat Software for WordPress, and get started with most easy to use WordPress chat software available in 2022.
Comments Off on The best live chat software for WordPress 2022 for business and professionals looking to convert traffic.Written by superadmin
Integrating live chat software for your Duda website is easy.
To integrate SYNCRO’s live chat software, simply follow these 3 easy steps:
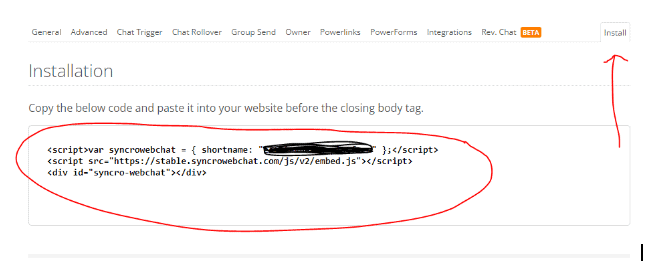
First login into SYNCRO and grab the install code for your SYNCRO website instance:
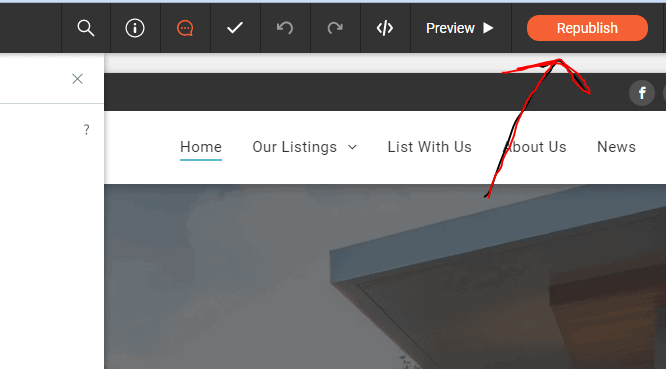
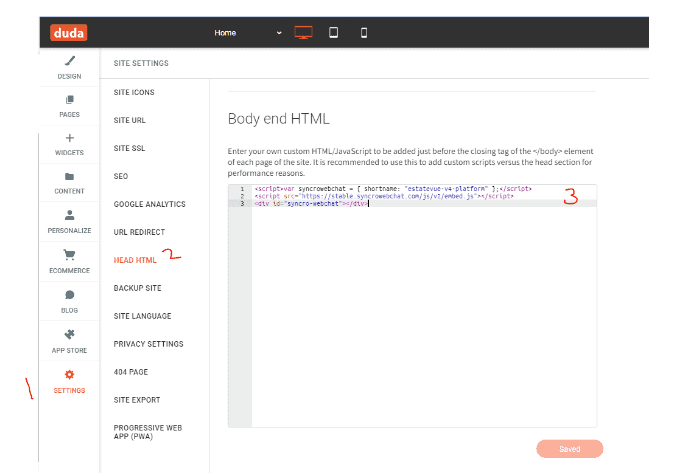
Once you have your embed code copied, login to your Duda site, and find the settings button in your editor, paste it in the editable box. 3. Click save, and then publish your site.
Thats all there is to it. Now you can enjoy the benefits of have a live chat software built into Duda. Please note, that all settings for SYNCRO can be adjusted inside of SYNCRO and the code does not need to be modified inside your Duda website once installed. This makes any little adjustments you want to make effortless and simple to do.
To sign up for a free trial to SYNCRO, please click here.
Comments Off on How to add SYNCRO to your Duda website in 3 easy stepsWritten by superadmin
Here At SYNCRO Web Chat we developed our live chat software to ensure it works for Squarespace, and all other online website builders.
Some of the website builders out there can be difficult for some people as they’re not familiar with web development, and they may not know where to place embed code. So we have put together a step by step guide on how to easily install SYNCRO into your Squarespace website.
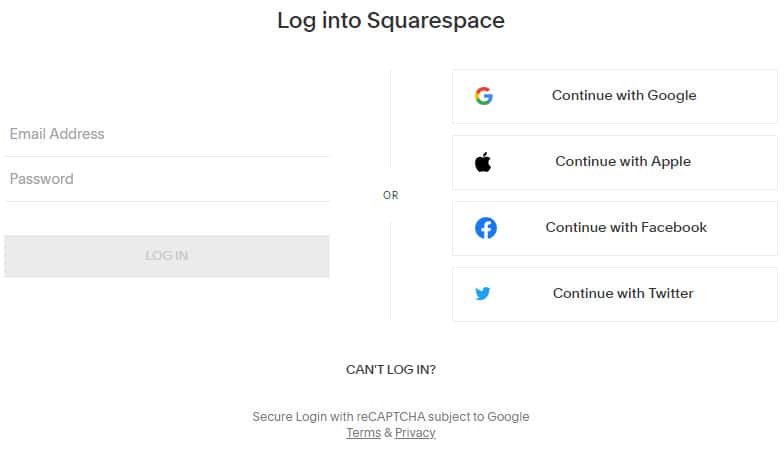
The first thing you’ll want to do is login to your Squarespace account.
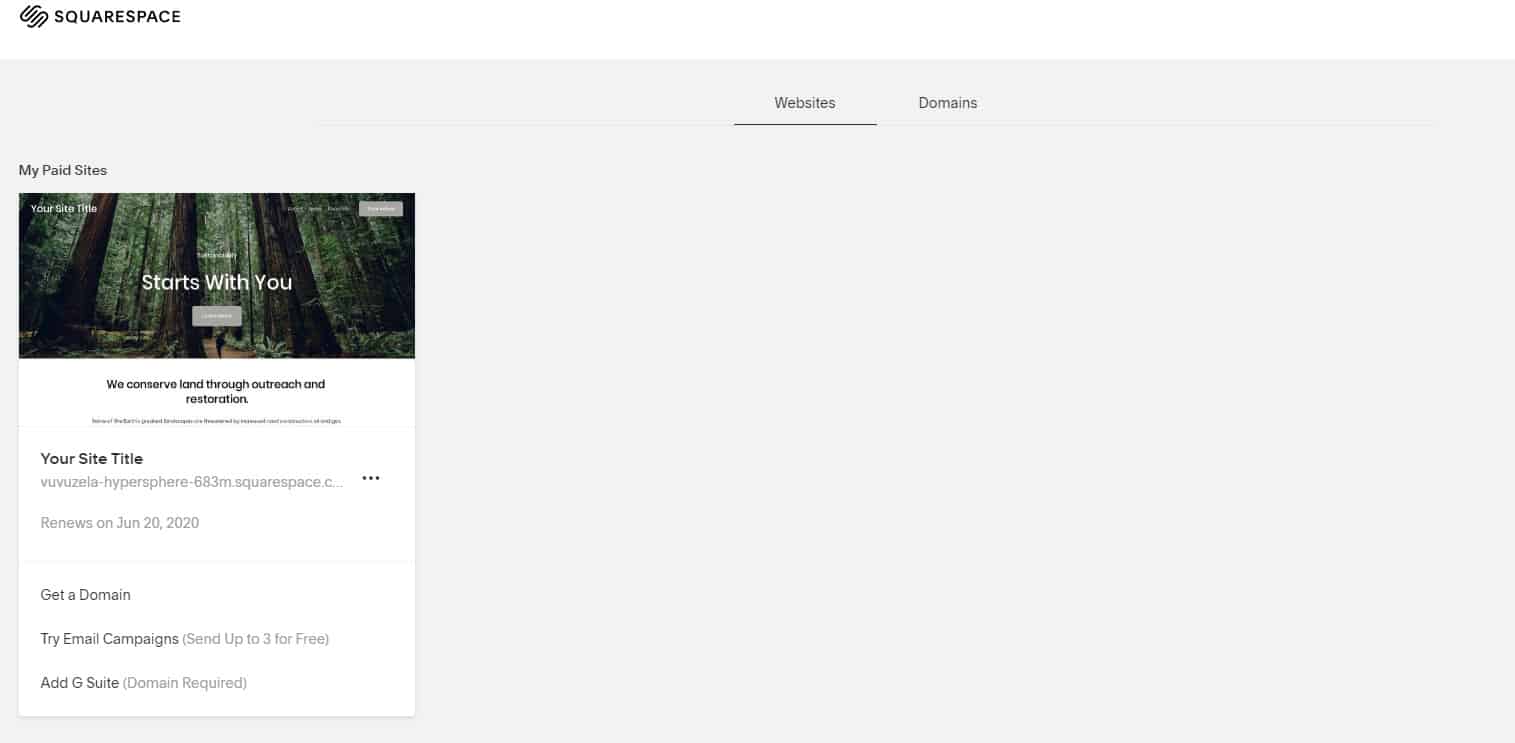
Next you will see your website under the “Websites” section. You need to hover over your site and click “Edit.”
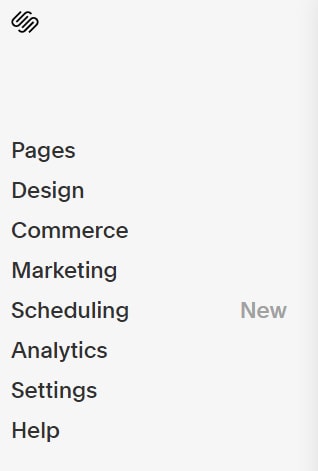
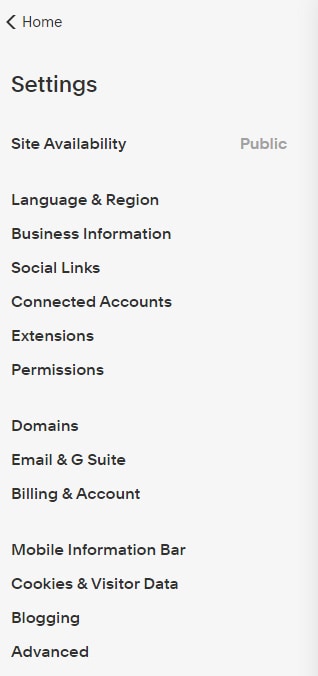
Next you need to click on “Settings” in the left hand menu.
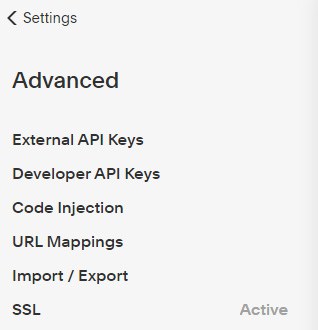
Then click on the “Advanced” button in the next left hand menu.
In the next menu click on “Code Injection.”
Now you need to sign in to your SYNCRO account. We recommend doing this in another tab so that you can keep your Squarespace site open in another.
Next click on “My Sites” in the top menu.
Next click the “Manage” button.
Now click on the “Settings” tab.
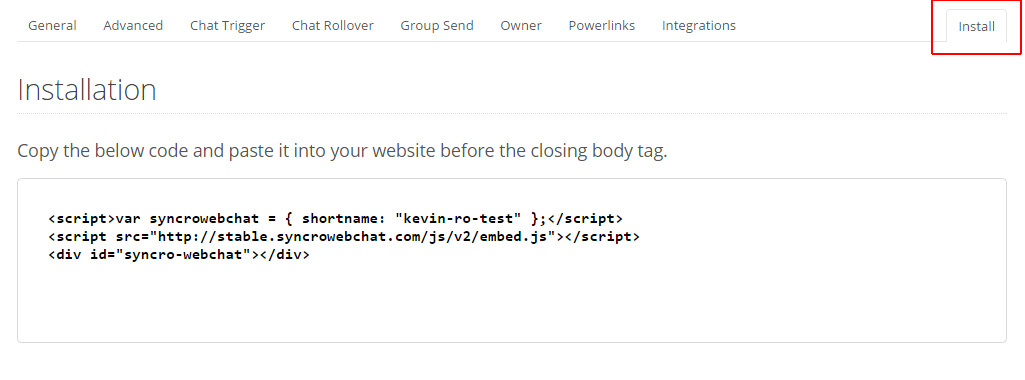
Now click on the “Install” tab. Here is where you need to copy the SYNCRO embed code.
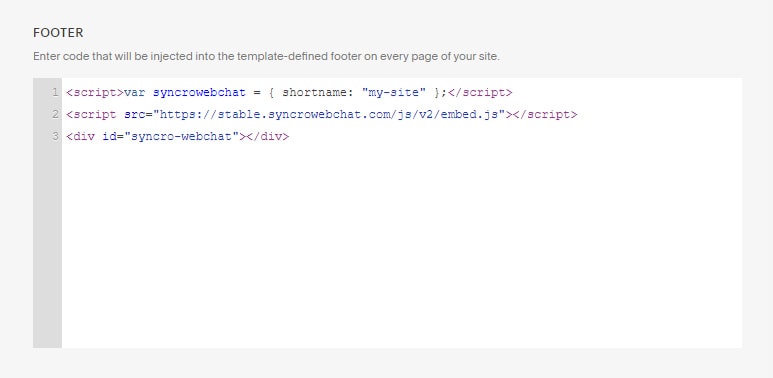
Now go back to your Squarespace “Code Injection” tab and paste the SYNCRO embed code into the “Footer” field.
Once you have pasted the code in, you just need to click the “Save” button located at the top left.
That’s all you have to do! SYNCRO is now working on your Squarespace website.
If you would prefer to watch these steps via video, you can watch the installation video below.
So if you’re looking for a live chat software for Squarespace, or if you need any assistance installing it please don’t hesitate to contact us. If you’re new to SYNCRO click here for a free trial, or here to sign up.
Comments Off on Live chat software for Squarespace – Installation InstructionsWritten by superadmin
Here At SYNCRO we developed our live chat software to ensure it works for weebly, and all other website builders. We always want to ensure that our software works with any type of website, whether it be custom websites, themed websites, or websites built on builders like Weebly.
Some of the website builders out there can be confusing for some and users may not know where to place embed code within their site. So we have put together a step by step guide on how to easily install SYNCRO into your Weebly website.
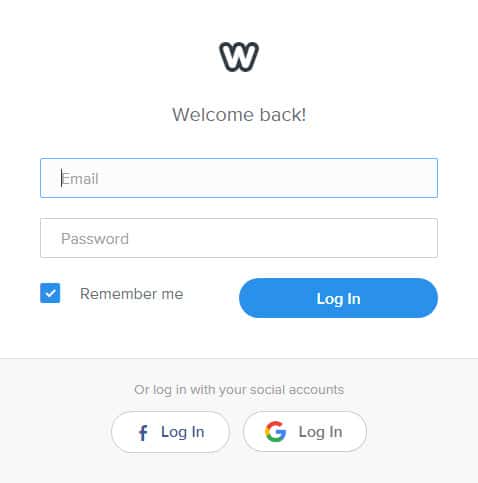
The first thing you’ll want to do is login to your Weebly account.
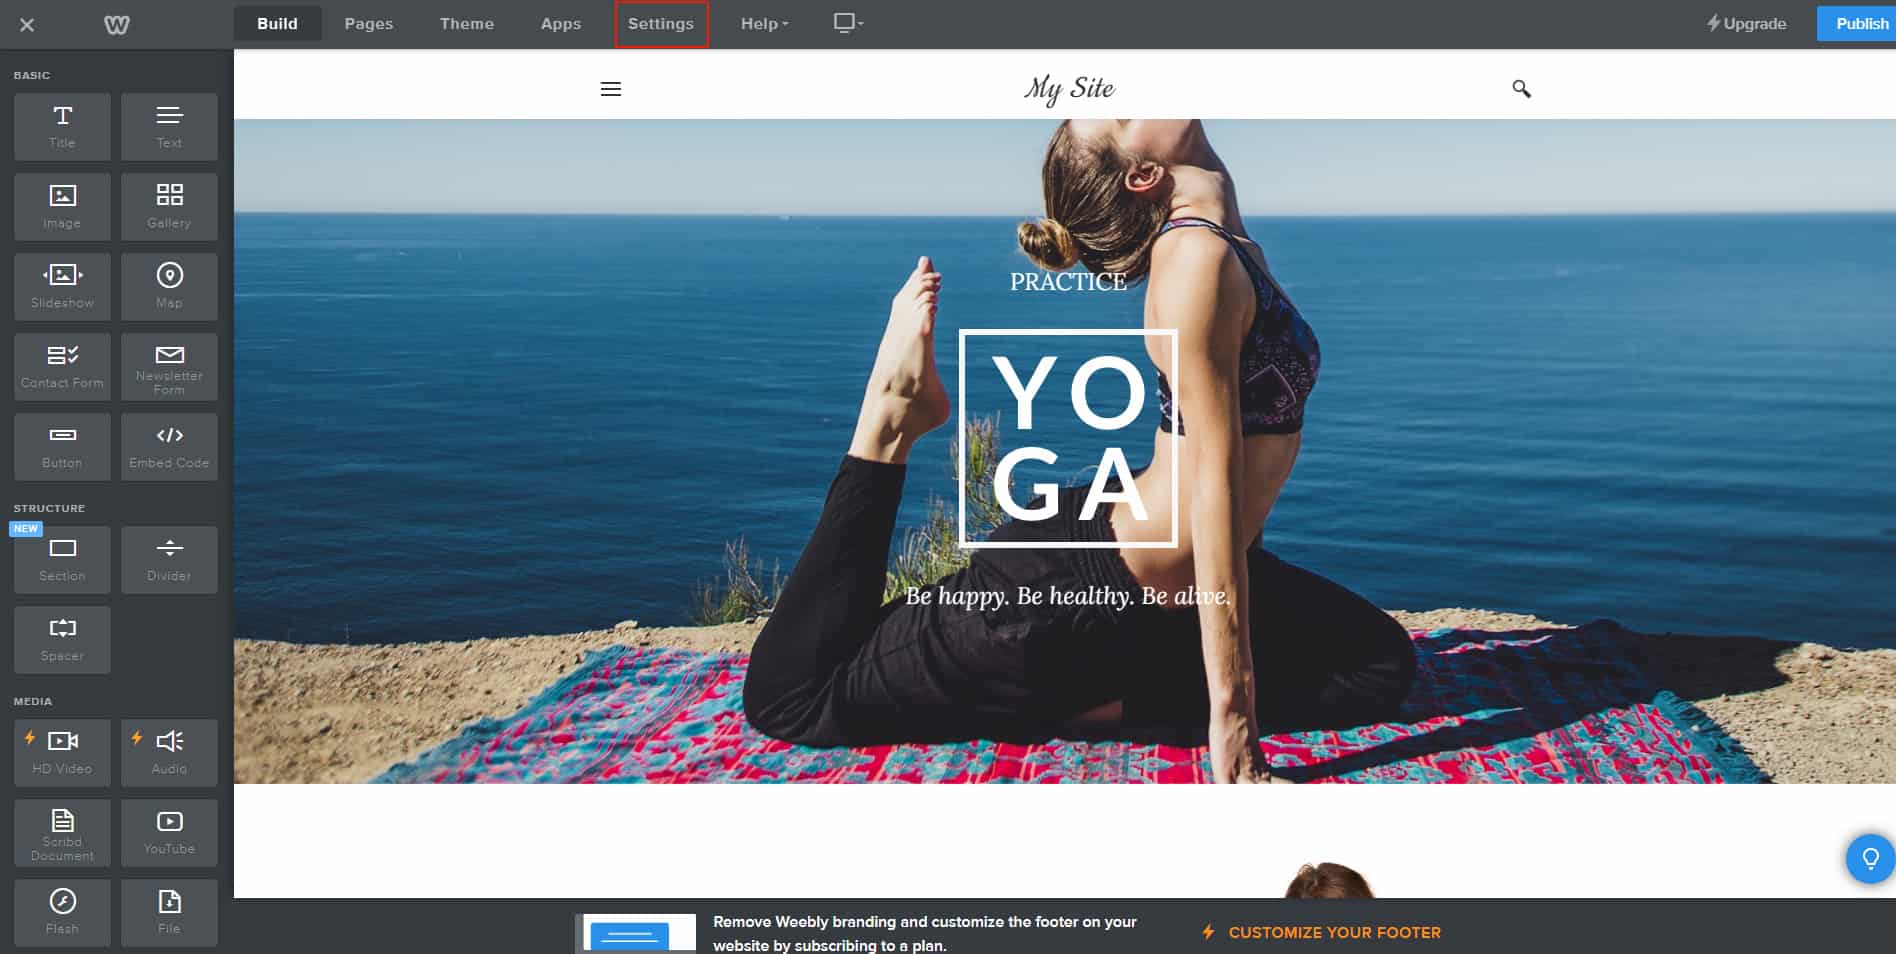
Next click the “Edit Website” button.
You will now be taken to the Weebly website editor. From here you will want to click on “Settings” button in the top menu.
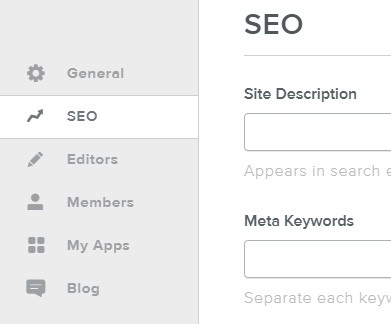
Next you need to click on the “SEO” tab in the left hand menu.
Now you need to sign in to your SYNCRO account. We recommend doing this in another tab so that you can keep your Weebly site open in another.
Next click on “My Sites” in the top menu.
Next click the “Manage” button.
Now click on the “Settings” tab.
Now click on the “Install” tab. Here is where you need to copy the SYNCRO embed code.
Now go back to your Weebly SEO tab and paste the SYNCRO embed code into the “Footer” field.
Lastly click on the “Save” button.
You are done! SYNCRO is now working on your website.
If following along to a video is more your speed, watch the installation video below.
So if you’re looking for a live chat software for Weebly, or if you need any assistance installing it please don’t hesitate to contact us. If you’re new to SYNCRO click here for a free trial, or here to sign up.
Comments Off on Live chat software for Weebly – Installation InstructionsWritten by superadmin
If you’re here it’s because you have a made a very smart decision and signed up for our live chat software for groups, locations, departments and more. Here are the steps you need to take to set this feature up.
Now that you’ve logged in, you’re going to add all of your locations.To do this first click on the “My Site(s)” button in the top menu, then click the “Add New” button.
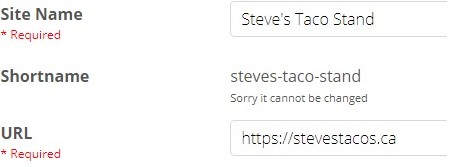
Enter your “Site Name” which in the case of SYNCRO live chat software for groups, will be the business name of this location.You’ll also need to enter the URL of the website where you will be installing SYNCRO.
You’ll need to fill out the fields on this next page with your contact information (Email address, mobile number, etc.) but for the purpose of efficiently explaining the Groups feature we’re going to skip this step. If you need help though you can always refer to our basic set up guide here.
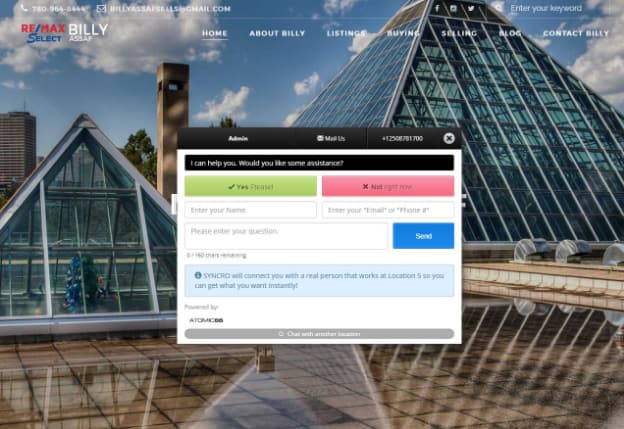
The first field you’ll need to know about is the “Chat Styles.” When someone clicks on the location of their choice the chat window will appear. We have given you 3 different styles to choose from.
Default The first choice is our “Default” aka our OG SYNCRO design. This one’s a bit old school but still one of our most popular. This style opens the chat window right in the center of the users screen.
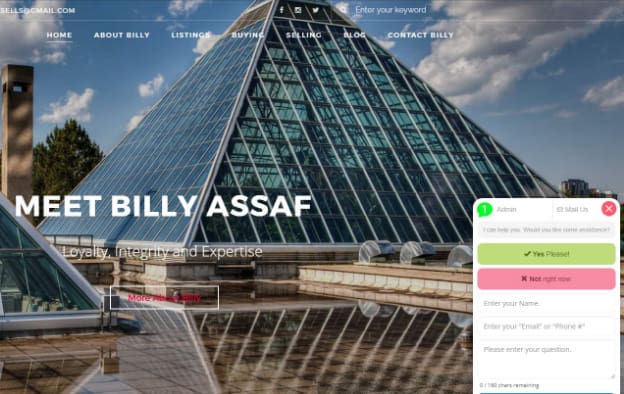
Sticky Chat Your next choice is the “Sticky Chat” style. This style is by far our most popular style as it has a modern design, and is located at the bottom right of the users screen.
Sticky Chat (Wide) The last style in the dropdown is “Sticky Chat (Wide).” It has the same modern design as the regular Sticky Chat but is slightly wider and is centered in the users screen.
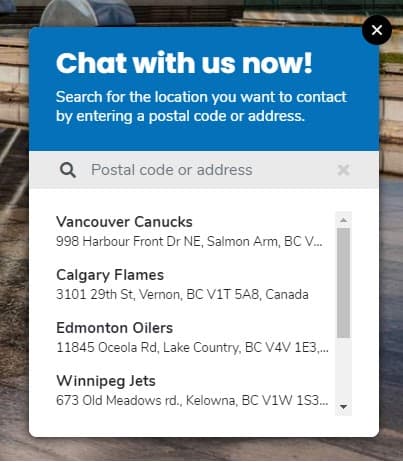
ADDING ADDRESSES TO GROUPS FOR LOCATIONS
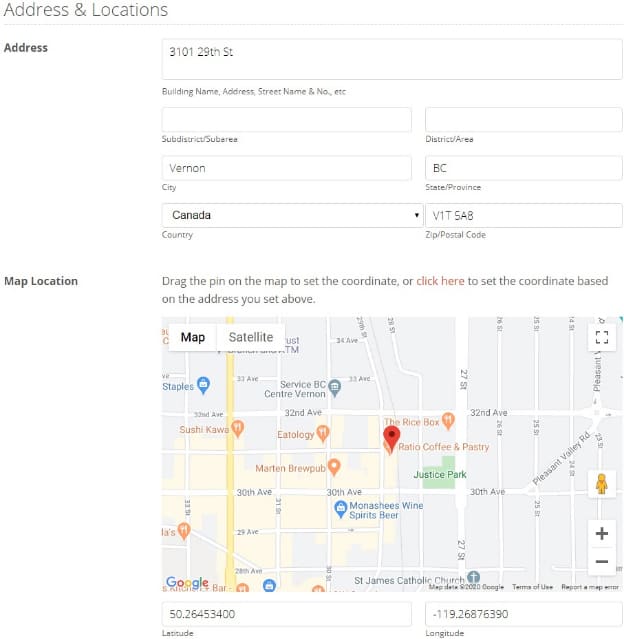
After you’ve selected the style of your chat window, it’s time to add your first locational address. We have made this very easy for you with our GEOLocation technology. All you need to do is fill out the address fields for your location, and click the red “click here” link. Our software will automatically find the location for you.
Lastly, don’t forget to click the blue “Save Changes” button.
Repeat the steps above for each location you would like to add by repeating the above steps.
CREATING GROUPS
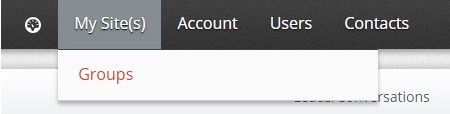
Once you’re done adding all locations you will need to create the group. You can do this by hovering over “My Site(s)” in the top menu, and clicking on “Groups.”
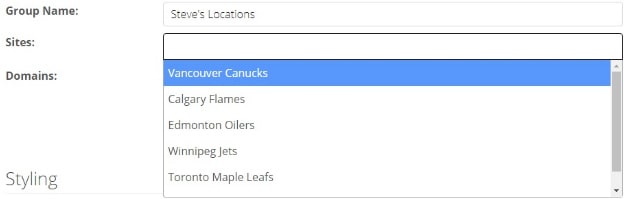
First you’ll want to add your “Group Name.” We suggest calling it something that describes your Group for easy reference.Then click your mouse inside the “Sites” field and you will see a dropdown of all the locations you just setup.Click on one to add the location.Repeat this step to add all locations to the Group.
Next enter the “Domains”where you will be installing SYNCRO.
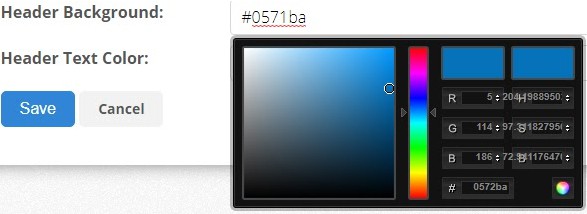
STYLING THE GROUPS CHAT WINDOW
Next you are going to choose the style of the main popup window for your SYNCRO Groups. It is always best that something like this matches the colors of your site, so we gave our users the option to customize the popup. This is an example of what this particular color combination looks like on the website:
INSTALLATION
Now that you have completed the setup of your SYNCRO Group, it’s time to install it on your website.
First you’ll need to click on the “Install” button.
Next, copy the embed code that SYNCRO generates for you, and paste it in your website’s code directly before the closing </body> tag. Once that is done go ahead and load up your website, and your SYNCRO Group will appear!
Comments Off on Basic Setup for SYNCRO GroupsWritten by superadmin
Live chat software + GoDaddy
(Updated Aug 25, 2021)
How to integrate SYNCRO live chat software into your GoDaddy website with ease!
GoDaddy’s drag and drop editor has been designed to make life easy when you want to make small changes to your website. Unfortunately, embedding code into a GoDaddy website has some restrictions due to specific restrictions put in place to protect their system from people trying to exploit the editing framework. These restrictions mean that you can only embed code into a website theme (as of April 2020) in a iFRAME element, thus limiting the types of embed code and structure that can be integrated.
At SYNCRO we have developed a chat interface specifically for this limitation that GoDaddy has created, allowing you to easily embed SYNCRO live chat into your website in seconds. You can even add call to action links within your site that will shoot you down to the chat too – super simple!
Let’s follow the steps to easily and quickly add our live chat software to your GoDaddy website. SYNCRO is a live chat compatible with GoDaddy websites.
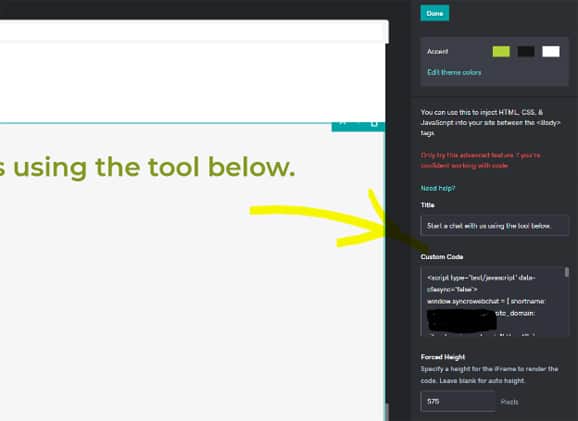
Go to your page editor, and create a block for custom code:
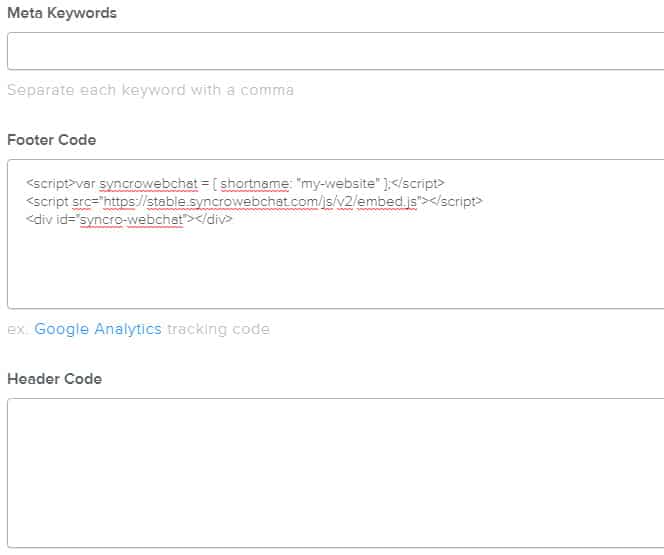
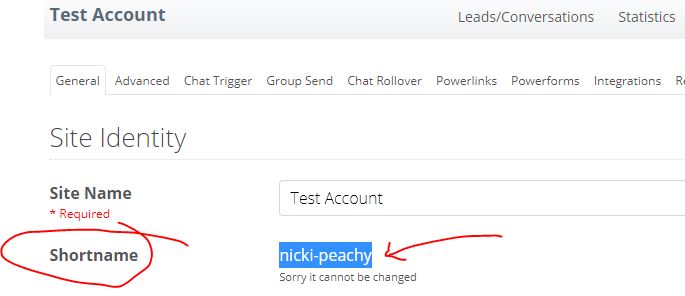
Paste your install code, which has been modified to work with GoDaddy: (Please REPLACE all items in blue so they match your account information. A. “yourshortname” is located on your general settings page (see image below). B.”yourdomain” is the website address you are setting up SYNCRO on. C. “protocol” If you do not have an SSL on your website, please use http:// as the protocol, otherwise leave as https://. <script type=’text/javascript’ data-cfasync=’false’> window.syncrowebchat = { shortname: “<A. YOURSHORTNAME>“, site_domain: “<B. YOURDOMAIN>“, site_domain_protocol: “https://” }; (function () { var done = false;
var syncrodiv = document.createElement(‘div’); syncrodiv.id = ‘syncro-webchat’; document.getElementsByTagName(‘BODY’).item(0).appendChild(syncrodiv);
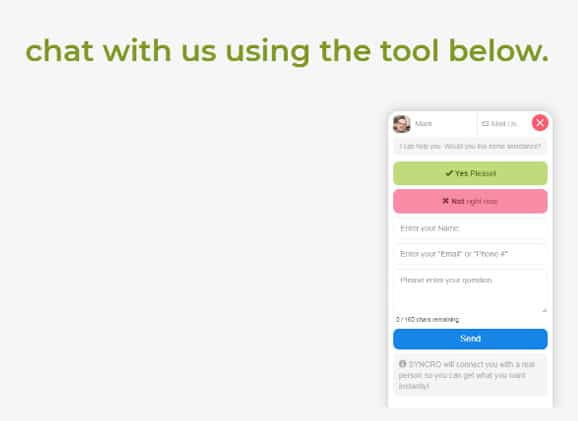
SYNCRO live chat software should now be installed and working on your website.
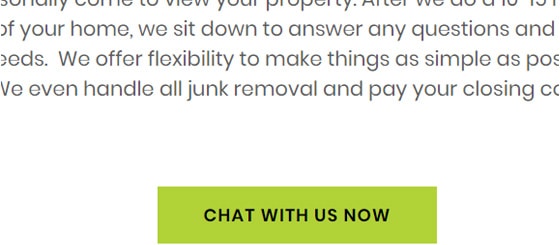
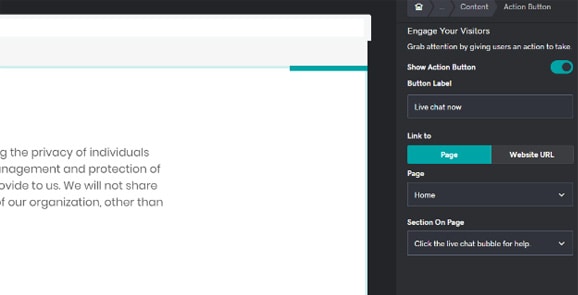
To customize further go ahead and create calls to action that drive people down to the live chat simply add action buttons, and link the text to your title you have given your block, so when people click on the button it shoots them down to your live chat tool. These buttons can be placed anywhere within a content block that allows for them to be created.
SYNCRO is one the best live chat software available that is compatible with GoDaddy websites. Go and give it a try!
Comments Off on Live chat software + GoDaddyWritten by superadmin
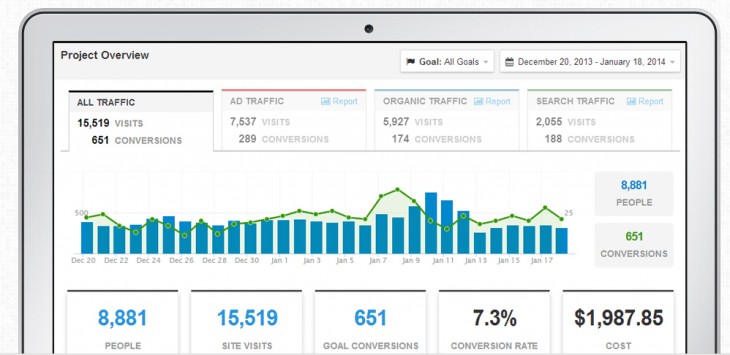
Improve.ly integration now available for SYNCRO
If you’re a fan of Improvely like we are, then you’ll be happy to know that we have now developed a way to track your SYNCRO chat conversions within this handy conversion tracking and click fraud monitoring software.
Follow the steps below to integrate with IMPROVE.ly and track conversions:
If you are using IMPROVE.ly you can now track your chat requests as conversions! We all know how valuable leads are, even if they are support related – well now by integrating with IMPROVE.ly you can track all of your chats.
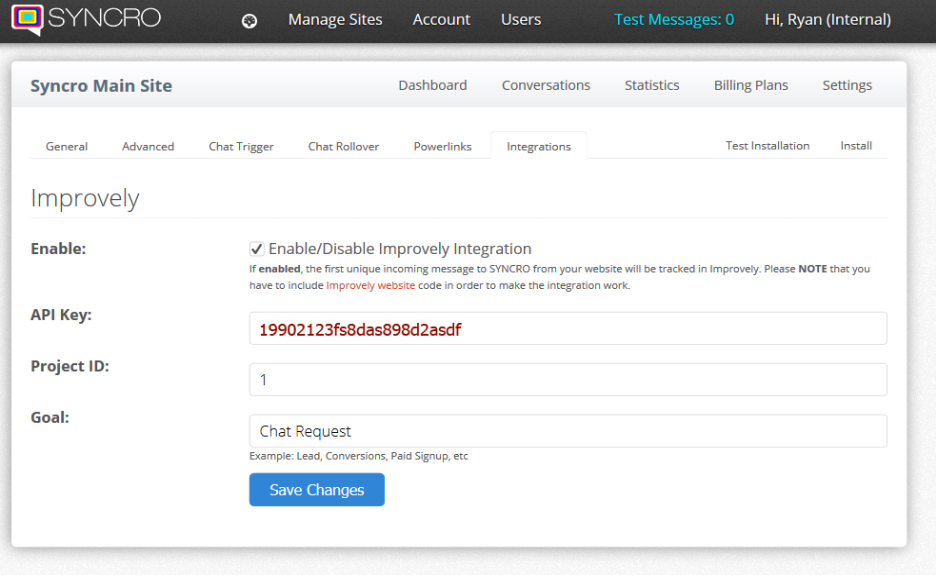
Simply login to your account, click on the site you wish to manage and then click the integrations tab:
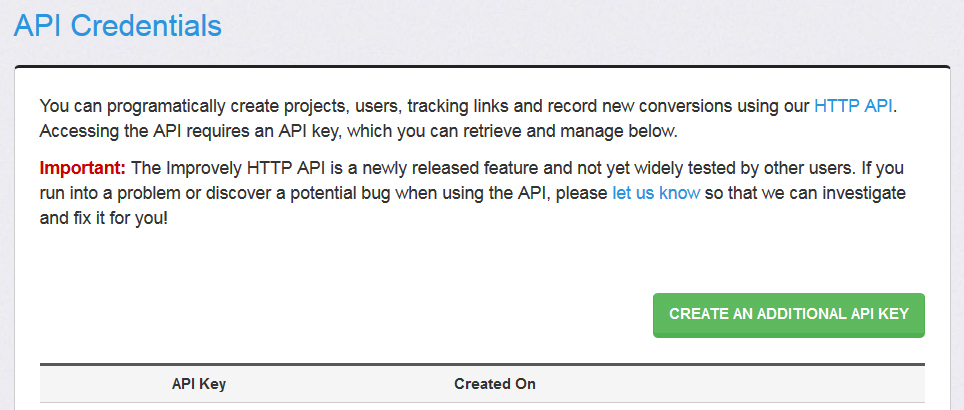
Next, take the API key that is given to you inside of Improve.ly on your API Credentials Page:
Lastly, enter the projectID (website) you want to track chats for!
That’s it! Now you are tracking chats from SYNCRO in Improve.ly!
Comments Off on New Integration – Improve.lyWritten by Jennifer Fuller
Part 3 in our integration point series.
How to integrate SYNCRO into a brokerage or corporate level website using Powerlinks.
We’ve talked about Powerlinks a little bit here and there, but these beauties really put the power into your online interactions.
Powerlinks can change a simple link, form, button or advertisement into an instant communication and lead conversion machine.
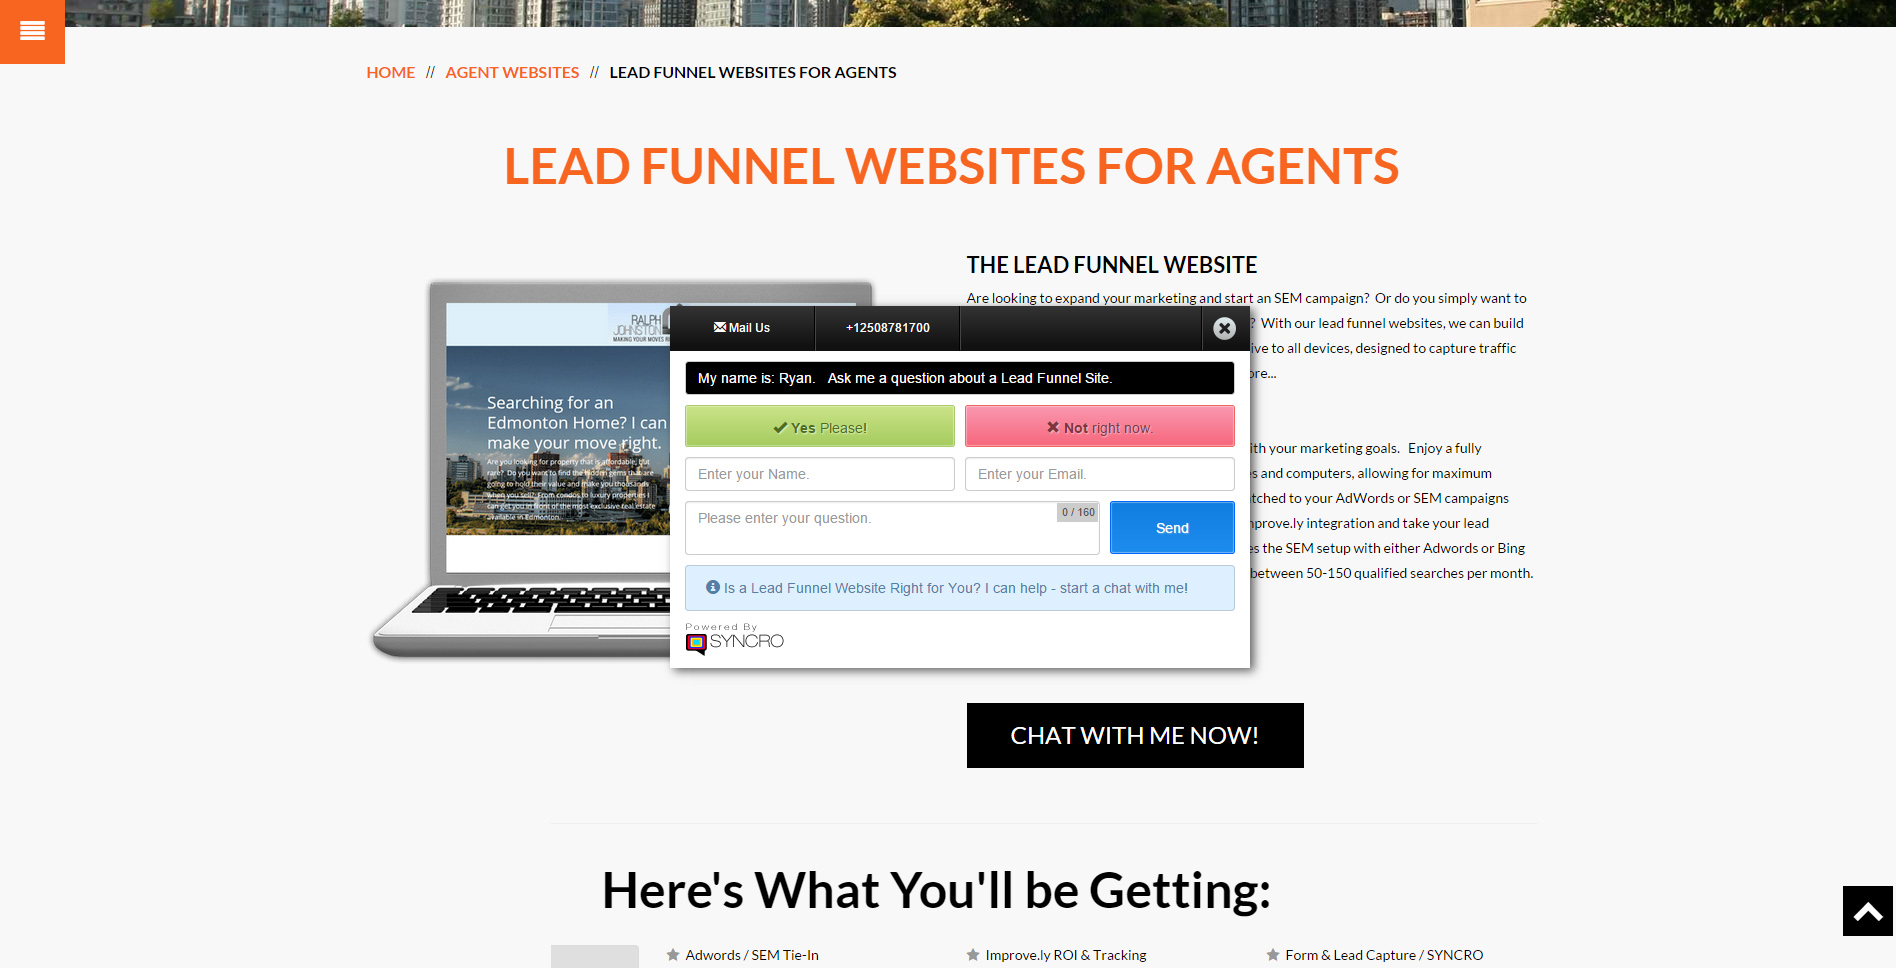
When a user clicks on a call to action with a Powerlink embedded behind it, they won’t just get an email pop up or a website contact form to fill out where they’ll have to wait hours for someone to take notice and respond. Instead they’ll be presented with a chat dialogue box where they can instantly engage with you in real time and get real answers from the only person who knows it like it is…you! Take a look at how we made a typical button that would normally send you over to a contact form instantly interactive below:
Why make your clients, who are craving instant answers, wait. With Powerlinks you don’t have to.
We can call up the chat window from any graphic, link, or form within your website. That lead will be sent to you at the precise moment in time that it’s hot. They don’t come fresher than Powerlinks leads.
If you’re interested in Powerlinks for your website, you’ll need to schedule some time with us to set them up for you. Again, our set up is free of charge and you are only ever charged when your legitimate lead comes through. It’s win for you. Win for your clients and win for technology that makes your website more human.
That concludes our Real Estate installation points. Let us know if we’ve missed something or you have other ideas to improve. We’re always listening!
Comments Off on How to Integrate SYNCRO :: A Walk in the Park :: Part 3Written by Jennifer Fuller
Part 2 in our integration point series.
How to integrate SYNCRO into a brokerage or corporate level website.
We have the capability of integrating SYNCRO three ways for brokerages and corporate clients and that’s not counting our Powerlinks strategy, which we will dive into during the last part of this website chat integration series. Brokerages and corporate accounts are afforded deep discounts off of our posted monthly unlimited usage rate when a commitment to use SYNCRO for all agents is agreed upon. You can choose to use one integration method or go with all three for ultimate efficiency.
Take a look at the unique way SYNCRO website chat to text message can work within your brokerage or banner website:
Agent on Duty:
The rotating agent on duty gets an upgrade with SYNCRO live website chat to text. We can embed live chat into your existing agent on duty widget following the design and branding of your website or we can custom design a chat now widget for you to use. Every time your website is refreshed and a page reloads, the user will be presented with a new agent from your roster who they can interact with in real time for quick help.
This randomization mechanism makes it fair for all agent within the brokerage as they will all have their shot at being discovered front and centered. We also offer standard PC to PC chat for agents and brokers who prefer to have an administrator handle the chats, but this would be better handled using our single site integration method.
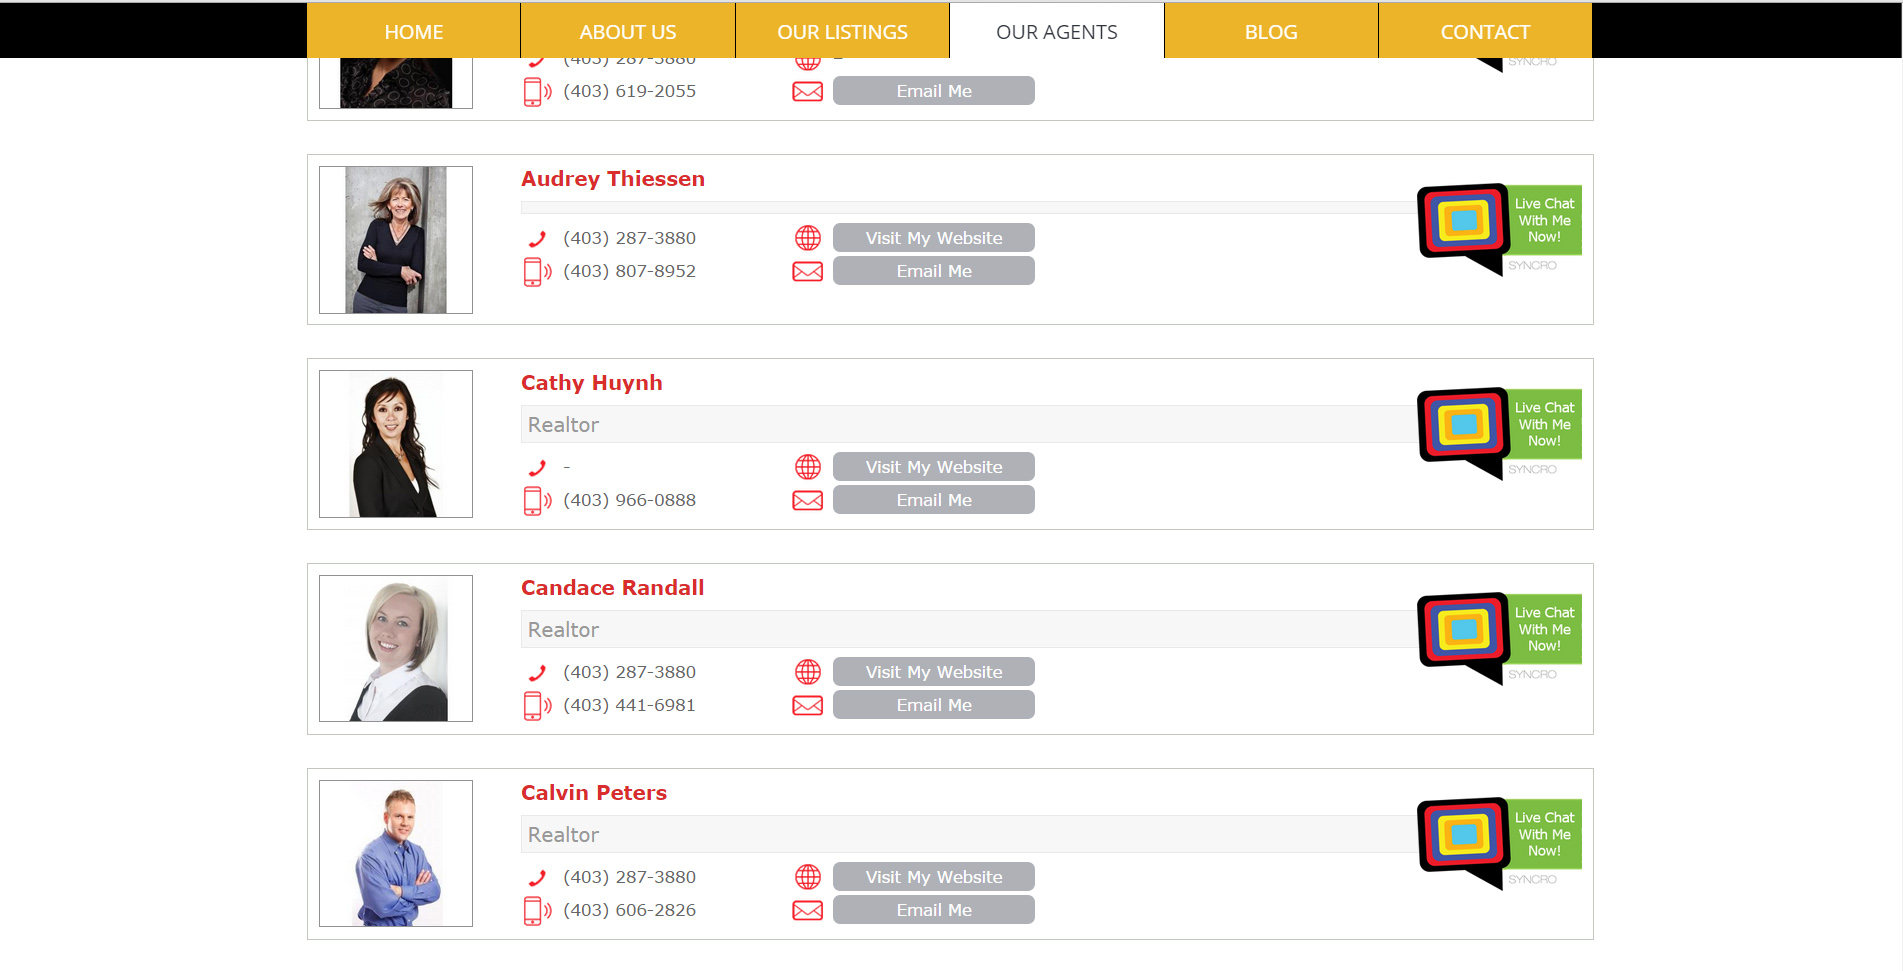
Agent Roster:
Every brokerage has a list of agents within their brokerage website, but SYNCRO will up the ante on real time engagement and give your agent roster some tangible action. By embedding SYNCRO into your agent roster, customers can instantly connect with the agent of their choice to ask real time questions, which will be sent directly to the agent’s mobile phone via text message. This cuts down on the need for your admin to be flagging leads all day and trying to decide who they need to send them out to.
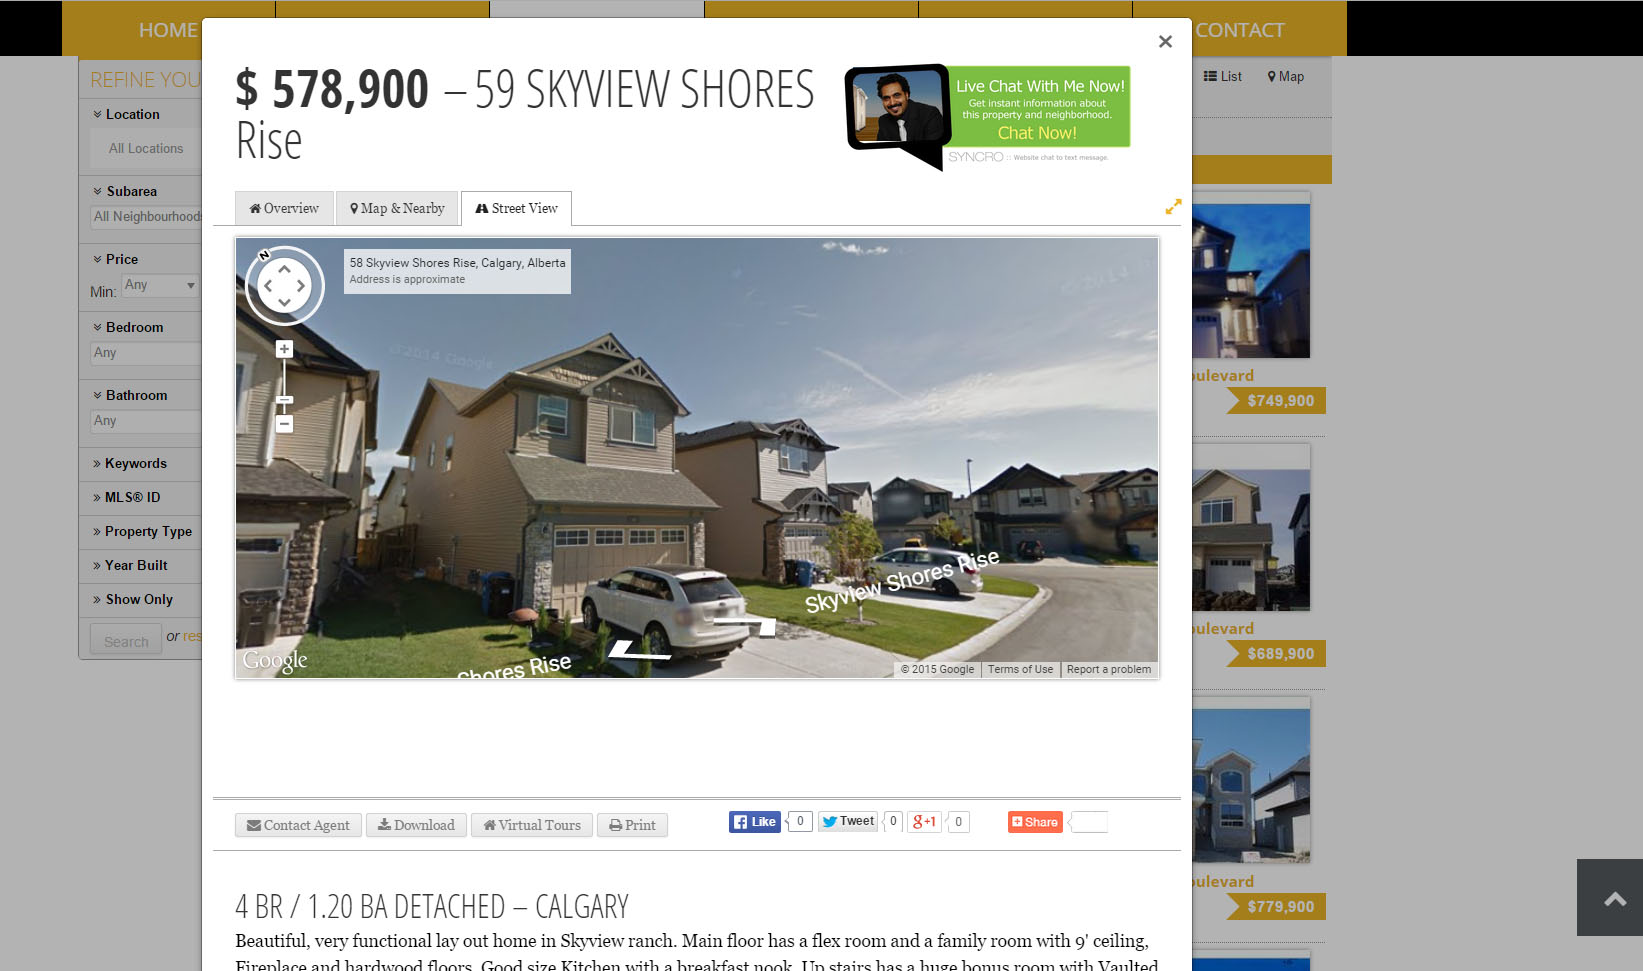
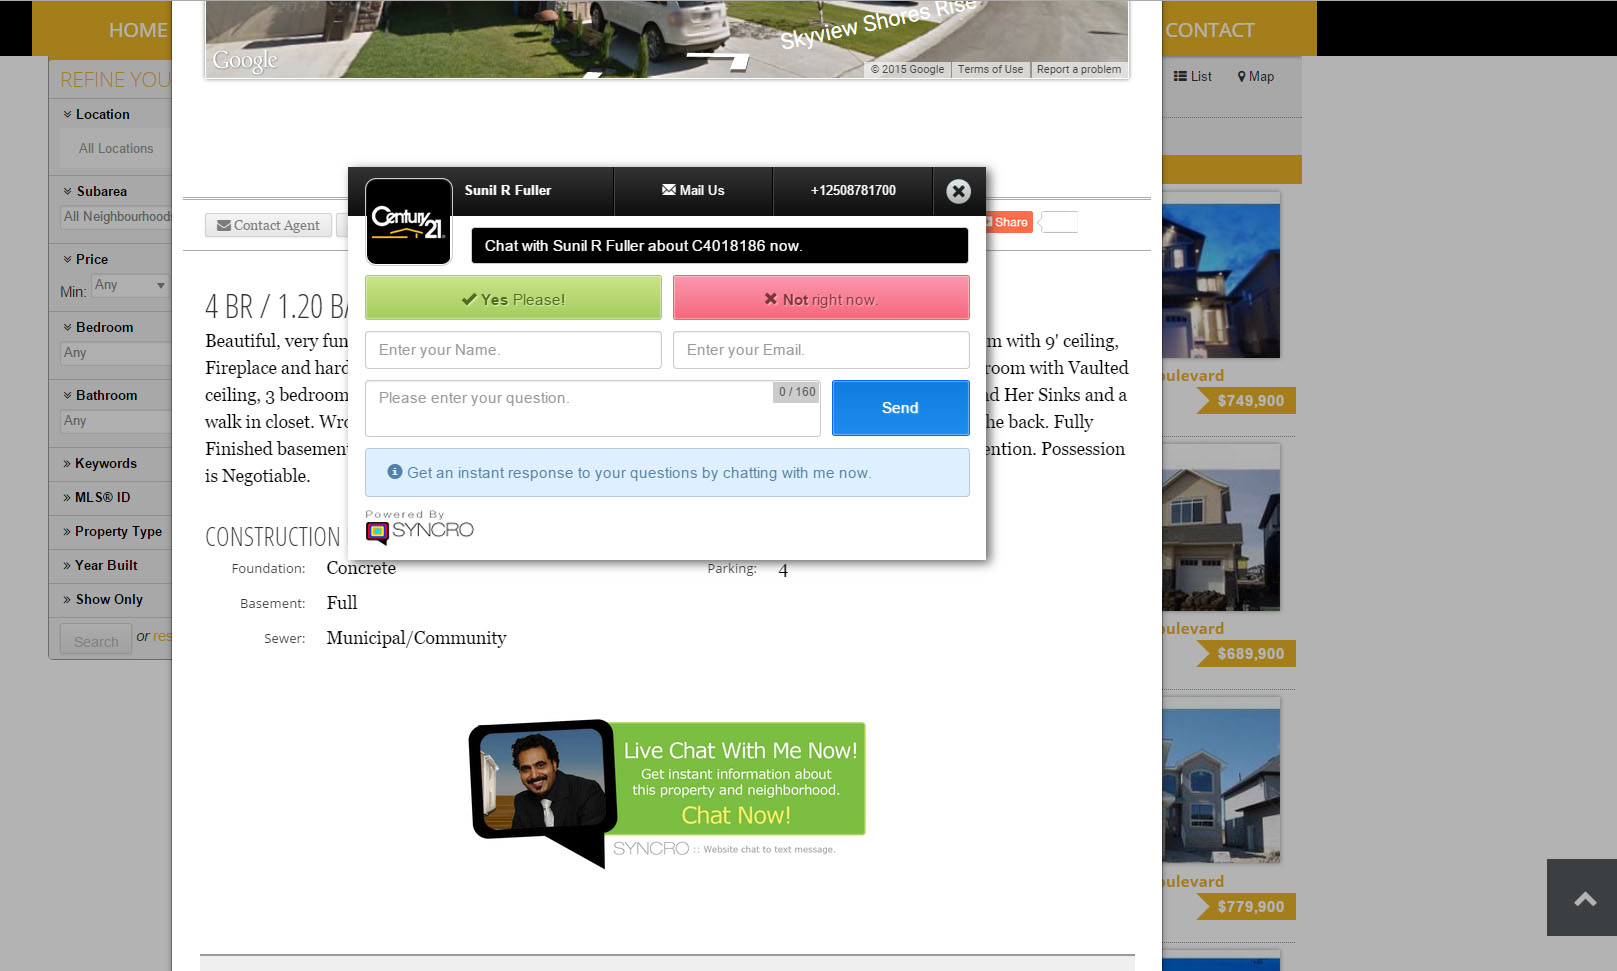
IDX/MLS Data Integration:
The third and most powerful way we can integrate SYNCRO is through the IDX/MLS data feed. We can use the data from your IDX provider to guarantee that the chat bubble is tied directly to the agent/realtor ID. This will ensure that all incoming chat leads from your brokerage website regarding the listing that agent owns will be sent directly, in real time, to the listing agents’ mobile phone number.
As a broker you can save money on admin costs, and stop the insanity of trying to finally determine who is next in line to get the lead from your brokerage website. This is a simple and effective way to ensure that all leads are dealt with fairly, especially when competition runs high from the biggest most authentic lead generator your agents have – your brokerage website.
Using SYNCRO makes for a great recruiting tool, because when a potential new hire asks how you deal with brokerage website leads, you can say that’s between the agent who’s representing the listing and SYNCRO. Our monthly reporting allows you to check in on your agents’ progress and see who is the most responsive, what’s working with customers as far as responses are concerned and leverage all that data to train and coach your agents into better lead closers.
Those are the three most popular ways to integrate SYCNRO into a brokerage website or corporate website to ensure an efficient live chat solution.
Pricing is quoted on a per agent basis and will depend on which integration method you choose to use. For more details on installing SYNCRO in any of the three ways listed above please contact our team directly.
Comments Off on How to integrate SYNCRO :: A Walk in the Park :: Pt. 2Written by Jennifer Fuller
The Single Website Install :: Part 1 in our integration point series :: A Walk in the Park.
SYNCRO was designed to be easy to install and integrate in multiple scenarios. This is the first part of our series titled SYNCRO installs :: A walk in the park. We have a few different ways to get SYNCRO into your website, from tying directly into US and Canadian real estate MLS/IDX data feeds, to agent rosters, power linking, single website applications and third party API’s, but the first thing we need to determine is how you do business and who you are trying to connect with.
Take a read through this multi part series and see which instance is right for you. We’re going to start with the most basic description of a SYNCRO installation and we’ll work our way through to the more advanced.
SINGLE SITE INSTALL:
The single site install is great for entrepreneurs who also handle the sales aspect of their business, real estate agents with a team of 3 or less, mortgage brokers with a team of 3 or less and virtually any other business that wants to convert their website leads using mobile without having to download an app.
The single site install is very simple to embed within your existing website and can be implemented by using the sign up process here. This sign up wizard will walk you through a few simple steps to get SYNCRO up and running within your website and if you hit a snag on the FTP details or what you need to do with that embed code at the end of it all, there’s a convenient HELP option.
Selecting HELP will alert us that you need some extra guidance from our support team. As soon as this alert reaches our team we will swoop in to save the day and get your install back on track. Our team is trained to get you off to the website chat to text races without any cost to your business because the beauty of our install support is that it’s absolutely 100% free. Whether you want to handle the install on your own or have us do it for you, it will still cost you nothing and it should only take minutes either way.
Once set up, the single site install will operate in a similar fashion to how you see the website chat option on this website. The chat window is nestled neatly into the bottom right corner and it waits for a customer to engage and interact with you. We have a number of other ways to pin the chat window to the website window including an unobtrusive chat bubble that locks to the side of the browser with a subtle blinking effect to catch a customer’s eye.
With a single site install you can personalize your avatar photo, your click to call number, and your welcome message to engage potential clients. You can also choose to enable the chat scheduler, the chat rollover and the chat trigger messaging.
The single site install also comes with real time reporting and web stats and is a great, easy way to increase conversions and track leads.
Pricing for the single site install is $10 per qualified incoming interaction or $50 per/month for unlimited chatting. Your first 10 messages are free to take it for a test drive.
Those are the basics of the single site install. It literally takes 5 minutes to get you signed up and have SYNCRO working in your site. If there are any problems at all give us a call, use the help button at the end of the signup process or SYNCRO us and we’ll be happy to help you get up and running.