
Here at SYNCRO we try to make installation easy for all of our live chat software customers, and our latest installation guide is focused on WebsiteBuilder. Here is a step by step guide on how to easily install SYNCRO into your Website Builder website.
- The first thing you’ll want to do is login to your WebsiteBuilder account.


- Next click on the “Edit Site” button.


- You will then be taken to the website editor. Now you’ll want to click on the “Settings” button in the top center menu.


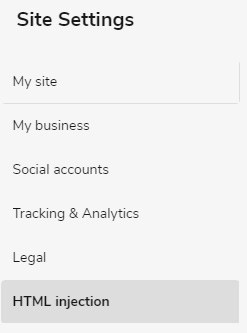
- In the “Settings” popup window click on the “HTML Injection” button in the left hand menu.

- Now you need to sign in to your SYNCRO account. We recommend doing this in another tab so that you can keep your WebsiteBuilder site open in another.


- Next click on “My Sites” in the top menu.


- Next click the “Manage” button.


- Now click on the “Settings” tab.


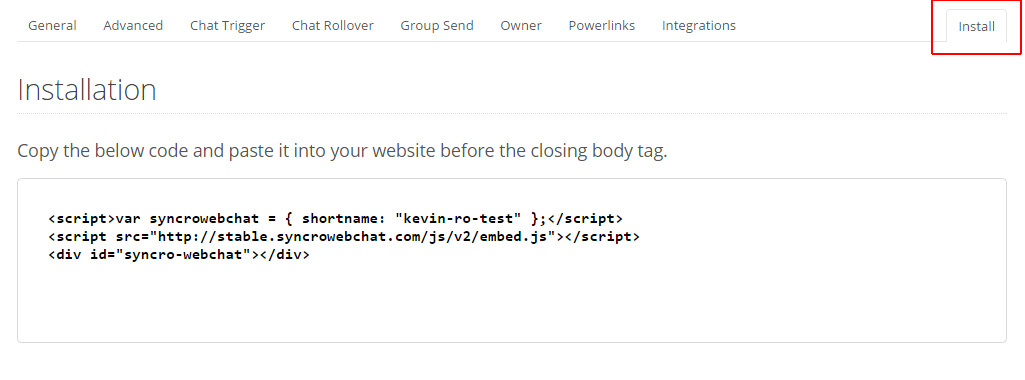
- Now click on the “Install” tab. Here is where you need to copy the SYNCRO embed code.

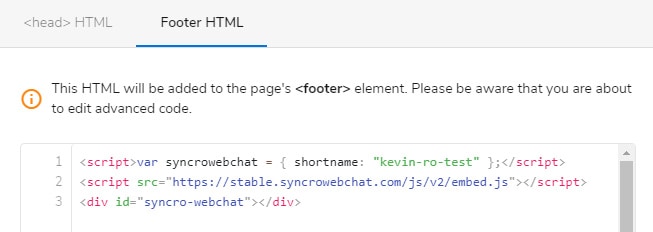
- Now go back to WebsiteBuilder and in the “Footer HTML” tab and paste the SYNCRO embed code into the area provided.

- Now click the “Save” button.


- Lastly click the “Publish” button located at the top right of your screen.


If you’re looking for a live chat software for WebsiteBuilder, or if you need any assistance installing it please don’t hesitate to contact us. If you’re new to SYNCRO click here for a free trial, or here to sign up.